
Improvements in CUBAs REST API v2
Next to the application components, there is another interesting feature that is a part of the 6.3 release of the CUBA platform. It deals with the REST API feature. In this blog post we will have a deeper look into it and see where are the differences and potential benefits of it.
Once upon a time, there was a blog post
Last year I did a blog post about the REST-API implementation of the CUBA platform. In the release 6.3 the generic REST API has been more or less redesigned completely. Due to the massive changes, it is worth taking another look into it.
Just to give you a quick recap on what the old (v1) REST API was all about, here’s a small list of features that have been included:
- (API-)user authentication
- CRUD on single entity instances
- get a list of entities through a JPQL query definition
- execute business logic through service calls via HTTP
- up- / download files from file storage
- create views to customize entity representation retrival
In the new implementation, the feature list pretty much remains the same, but the way to execute the different features changed quite a bit.
So let’s look at the things that have changed.
Changes on CUBAs REST API
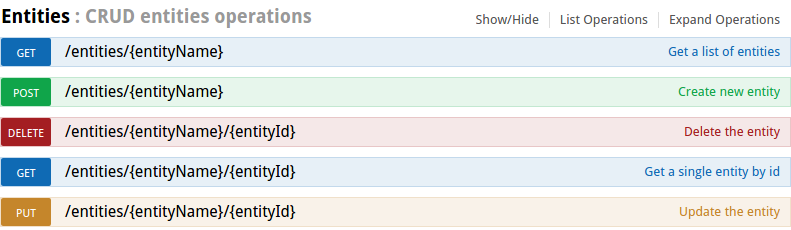
The authentication mechanism has changed to OAuth2 mechanism. Next is that the CRUD operations on the entity level have become much more “RESTful” towards a de-facto standard resource naming which is implemented by most of the major web application frameworks. This also includes usage of the most common HTTP verbs.
Authenticate via OAuth2
The first major change concerns the login mechanism. The v1 based login mechanism was based on a homegrown login mechasim. In the version 2 it is a fully compatible implementation of the OAuth2 specification. The login mechanism basically goes like this (to communicate to the REST API I use the cmd line tool Httpie):
The API client sends a POST request to the server to get an access token. In order to accept the request, it has to be executed with basic auth in place (client:secret). These hard coded client secrets can be configured in the app.properties of the CUBA application (cuba.rest.client.id and cuba.rest.client.secret). In the body a form is send with the actual credentials of the user.
The result is a JSON with a access_token in it. This token has to be used for further requests in the Authorization header like this: 'Authorization:Bearer abc315c8-2790-4d5a-8ca9-7e9c9922e168'.
Here is the full example:
$ http --form --auth client:secret  POST localhost:8080/app/rest/v2/oauth/token grant_type=password username=admin password=admin

HTTP/1.1 200 OK
Content-Type: application/json;charset=UTF-8

{
    "access_token": "abc315c8-2790-4d5a-8ca9-7e9c9922e168",
    "expires_in": 43199,
    "scope": "rest-api",
    "token_type": "bearer"
}
CRUD operations on entites
With the acces token we are able to consume the REST API by passing the token to every request. One example of this is that we can create a request that will list all customers that the user is allowed to see (you can download the example app from github).
$ http localhost:8080/app/rest/v2/entities/cesdra\$Customer 'Authorization:Bearer abc315c8-2790-4d5a-8ca9-7e9c9922e168'

HTTP/1.1 200 OK
Content-Type: application/json;charset=UTF-8

[
    {
        "_entityName": "cesdra$Customer",
        "_instanceName": "Reuben C. Bridges",
        "id": "091e878a-2da1-a73f-6274-28e6ba7e902e",
        "name": "Reuben C. Bridges",
        "version": 2
    },
    {
        "_entityName": "cesdra$Customer",
        "_instanceName": "Ida B. Rossi",
        "id": "16158ff7-d162-2e76-97cf-4fd04883861c",
        "name": "Ida B. Rossi",
        "version": 2
    },
    {
        "_entityName": "cesdra$Customer",
        "_instanceName": "Joshua Howe",
        "id": "68dfa571-be1c-2559-c5b6-743aa87d4c8c",
        "name": "Joshua Howe",
        "version": 1
    }
]
This structure is basically the same that all of the major web frameworks support nowadays. CUBA offers a swagger API description which is a very cool feature to get familiar with the API structure.
Predefined queries instead of per-request-JPQL
One thing that changed dramatically is the feature to execute arbitrary JPQL queries. In the v1 version the client could create a request that had a JPQL in it which should get executed. This exposure of the database query language in the API is something that might be valuable for integration purposes, where you control the sender as well as the receiver. But from a API point of view, it is like exposing detailed information about the implementation structure to the outside world.
Since the v2 of the API moves much more towards a public facing API facility, this feature was removed. The replacement for that is that you can define something that is very similar to Named queries in the JPA world for the API on the server. These named queries act as the abstraction machanism to the API consumer. This way the customer is not forced to know about the internal entity structure. Instead, it only has to know about the name of the query and the parameter that this query might have.
Here’s a small example of that definition:
<queries xmlns="http://schemas.haulmont.com/cuba/rest-queries.xsd">
    <query name="customerByType" entity="cesdra$Customer" view="customer-view">
        <jpql><![CDATA[select c from cesdra$Customer c where c.customerType = :customerType]]></jpql>
        <params>
            <param name="customerType" type="java.lang.String"/>
        </params>
    </query>
</queries>
It can be created in a file within your war file or in an external config folder on the server. But the main idea is that is has to be created in advance, so the client is not forced to define these details (which also means that the consumer can’t either).
But generally I think this is a very good way of defining an API abstraction.
Batch mode of entities is gone
Another thing to notice is that it is not possible to make a bulk import out of the box anymore. In the previous version is was possible to POST instances with the following JSON stucture:
{
  "commitInstances": [
    {
      "id": "NEW-cesdra$Customer",
      "name": "Mike"
    }
  ]
}
In the commitInstances array a list of entities can be created and inserted into the database within one database transaction.
Due to the change towards the de-facto standard REST URI resource pattern, this is no longer possible, because the instances are treated like resources. When an instance is created, you’ll get back an HTTP response 201 - created with a corresponding Location Header that points to this newly created resource (in this case - the entity). Something like this is hardly possible in a batch mode, because the response can’t point to the created resource. Also it would be problematic to handle validation errors in this case (which have been included in 6.4 with bean validation).
So this is just a thing to know. It would be possible to create a service that brings back this feature of doing bulk create, but with that you would get back to the RPC based approach of the API (which is exactly the point of the v2 API to drift away from that, at least in my understanding of it).
Using the REST API
There are several examples in the docs on how to communicate with the new API. Therefore I will not go into detail about the different CRUD operations, Service invocations etc.
Instead I would like to show you two little tools that I found quite appealing to deal with the API on a day-to-day basis. Above we have already seen the command line based tool called httpie. Httpie is just like cURL but optimized for ease of use. cURL has the downside that certain operations on HTTP (like form submit) are fairly verbose when you want to type them.
This is where Httpie kicks in. Let’s look at the Login process in cURL:
curl -X POST -H "Content-Type: application/x-www-form-urlencoded" -H "Accept: application/json" -H "Authorization: Basic Y2xpZW50OnNlY3JldA==" -d 'grant_type=password&username=admin&password=admin' "http://localhost:8080/app/rest/v2/oauth/token"With Httpie it changes to this:
http --form --auth client:secret POST localhost:8080/app/rest/v2/oauth/token grant_type=password username=admin password=adminIt just gives you a fairly nicer tool to do the easy HTTP things. But for some people fiddling around with the command line all the time is not the preferred way of doing it (including myself), so there is one other tool I used lately.
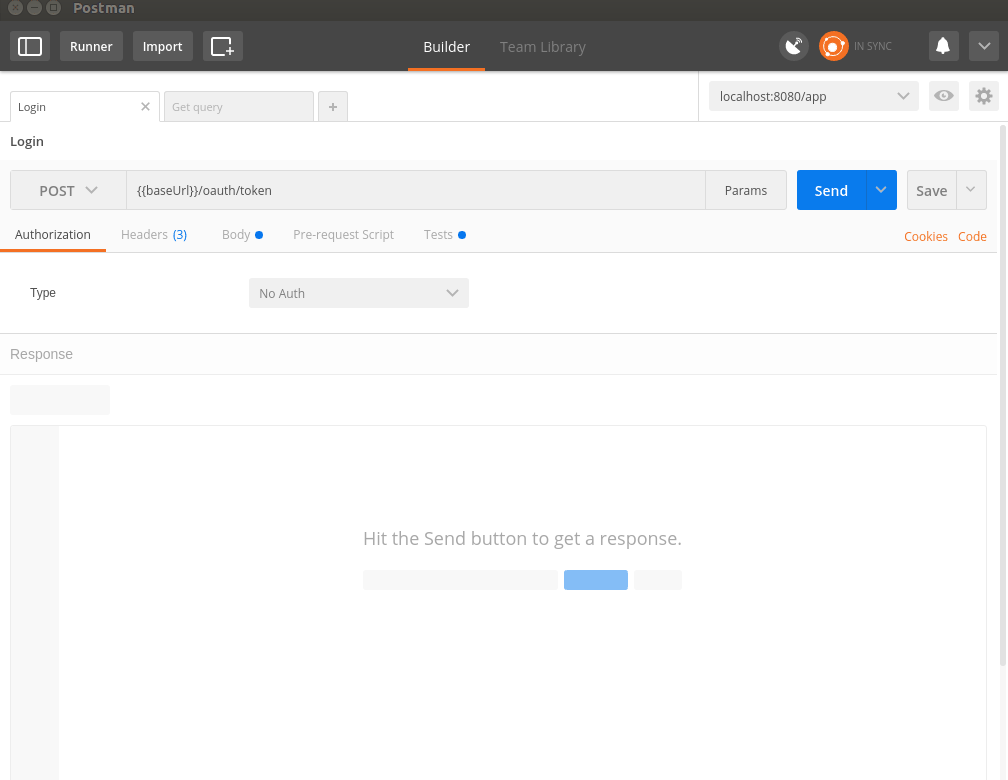
Explore your API with Postman
The next thing that I use really often for interacting with the CUBA API is the tool Postman. Postman is a UI based HTTP client that started out as a chrome plugin and emerged to a full fletched application. It is build on electron, which is pretty cool btw.
Postman has the possibility to create “Request collections”. These are groups pre-defined requests to your API. You can just select one and “send” it.
Additionally there is another building block which is called “Environments”. An environment is the possibility to parameterize your collections. One example of this might be the server URL. When you have different deployments of your application, say in dev, test and production you can create three environments with the definition of a particular variable that you use in your requests.
Here’s an example of the UI of Postman:
To get you an easy start with the tool, I created the postman collection as well as the postman environment within the github example. You can just import it into your Postman client and start fiddling around with it.
One very interesting thing that I noticed is, that it is possible to not only use this for debugging purposes and manual communication with the API, but for test automation as well. For this there is a Test tab in the UI where you can do asserts on the response with javascript. I’ll probably go into more detail on that topic in an extra blog post.
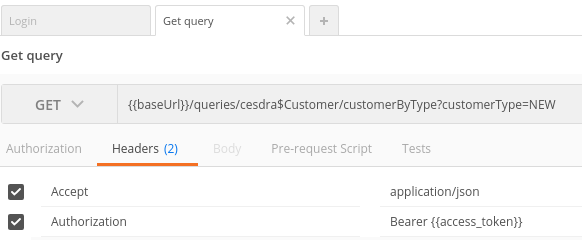
Within the shared collection I used it not for automated testing, but instead used the scripting facility to do some kind of automation. When you look at the Tests tabs of the Login request, you will find that I’ve programmatically created an environment variable within postman called ‘access_token’:
if (isResponseOk()) {
    var jsonData = getJson();

    var noErrorInBody = !('error' in jsonData);
    tests["No error in JSON response"] = noErrorInBody;

    if (noErrorInBody) {
        var access_token = jsonData.access_token;
        var accessTokenInBody = 'access_token' in jsonData;
        tests["Access token received"] = accessTokenInBody;

        postman.setEnvironmentVariable("access_token", access_token);
    }
}

function isResponseOk() {
    isResponseCodeOk = responseCode.code === 200
    istContentTypeOk = postman.getResponseHeader("Content-Type") == "application/json;charset=UTF-8";
    tests["Response is OK"] = isResponseCodeOk;
    tests["Content-Type is JSON"] = istContentTypeOk;

    return isResponseCodeOk && istContentTypeOk
}

function getJson() { return JSON.parse(responseBody) }
This script basically checks if the response is valid, and if it is, it will set the environment variable like this: postman.setEnvironmentVariable("access_token", access_token);.
With that everywhere in Postman the variable can be used just by using the double-curly braces notation (like shown below in the Authorisation header).
Using Swagger description in Postman
If you want to try out all features of the v2 API in Postman, there is even an easier way to do so, instead of creating all the requests by hand. Postman is able to import not only the collections in their format, but read the Swagger format as well. With this, you can just point Postman to the URL of the yaml description of CUBA which is: http://files.cuba-platform.com/swagger/cuba-rest-api-v2.yaml
With that you have imported the whole description of Swagger into your app and can start uploading files, do service requests etc.