
Continuous delivery with Gitlab and Rancher
Part 3 - CD deployment from Gitlab to Rancher
The third and last part of this series will combine all the already configured parts. After manually deploying the example application to rancher, we will use the Gitlab CD pipeline to do the job automatically for us.
After we insatlled and configured Rancher in the last part of the second blog post, lets use this installation to deploy our application to rancher.
Deploy to racher manually
In order to deploy an application to rancher, we need a docker-compose.yml file which describes our application and it’s dependencies. In the deployment directory of the sample app, there are two files. First the docker-compose.yml:
version: '2'
services:
  web:
    image: 'mariodavid/kubanische-kaninchenzuechterei:latest'
    ports:
     - "8082:8080"
  db:
    image: "blacklabelops/hsqldb:latest"
    environment:
      - HSQLDB_USER=kaninchen
      - HSQLDB_PASSWORD=kaninchen
      - HSQLDB_DATABASE_ALIAS=kaninchen
Besides the web application (which is our Docker image we created earlier), we need a running database. For showing you a running app with least effort, I used a HSQLDB Docker container. In the web-application the connection settings are hard-coded. The environment variables of the HSQLDB container configure the database to be accessible with this credentials.
The next file is the rancher-compose.yml. It is basically a file for all the settings docker-compose is not capable of expressing in its file currently.
version: '2'
services:
  web:
    scale: 1
  db:
    scale: 1
In this case we will just configure the amount of containers that should be running for every service.
Since the rancher cli is already configured correctly, you can the following command in order to create a stack in rancher:
rancher upThis command will print out some logs of the containers. When you look at the UI of rancher, it will popup a stack in the default environment.
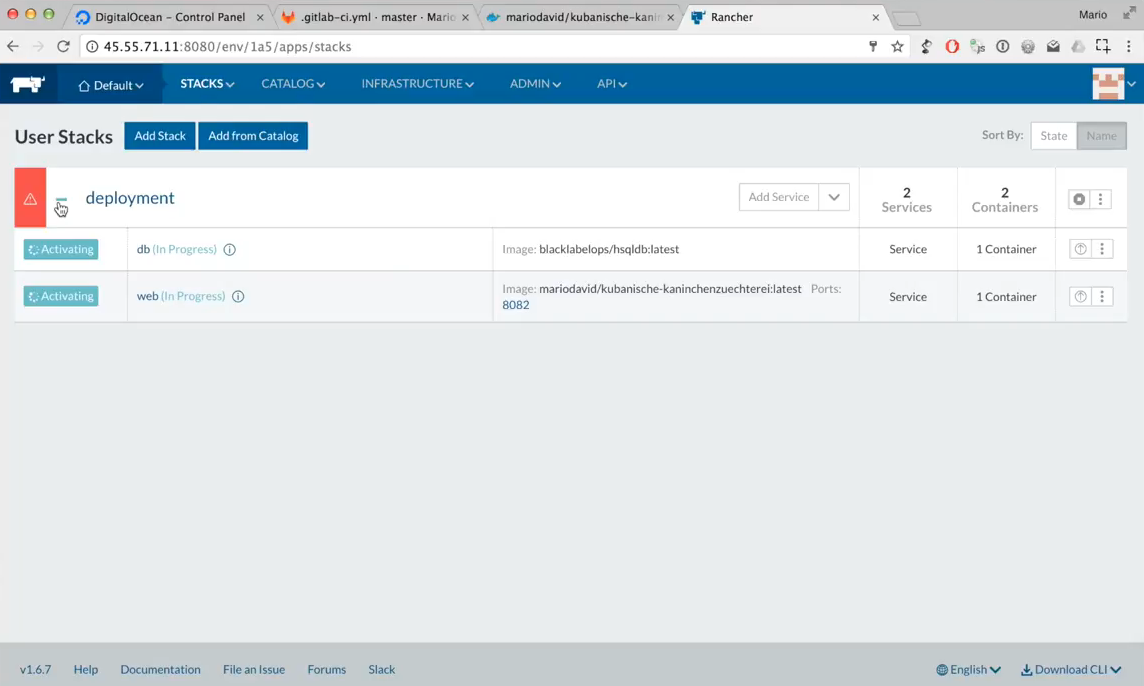
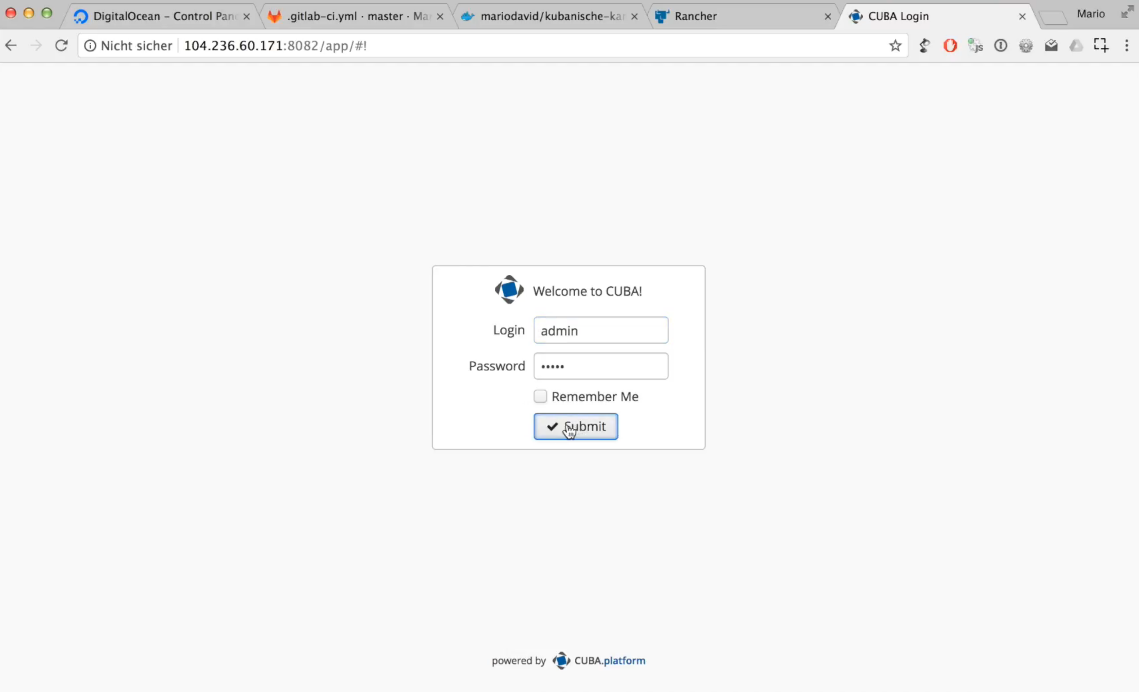
After waiting some time the web application will show up under the IP of the rancher host and the port 8082. Through the UI of Rancher after the image name of the service “web” there is the “ports” section which is a link to the application.
With this in place, we have our first application deployed to rancher.
Now we can let Gitlab do the deployment to rancher within the process of the CD pipeline.
Deploy application from Gitlab
Just like in the manual process, we need to define the environment variables for the rancher cli in Gitlab (which we previously already did with the docker credentials).
After this is done, we need to add another job in the .gitlab-ci.yml file which is called “deployContainer”:
...The image that we are using for this step is called “rancher-gitlab-deploy”. It will make the communication with rancher a little simpler. The alternative would have been that we create a Docker image ourselfs which already has the rancher cli installed. But as this image already exists, we can just go ahead and use it. The official repo of it can be found here: https://github.com/cdrx/rancher-gitlab-deploy
The command that will do the upgrade is called “upgrade” and it will take the name of the stack and the service as well as the image name as parameters.
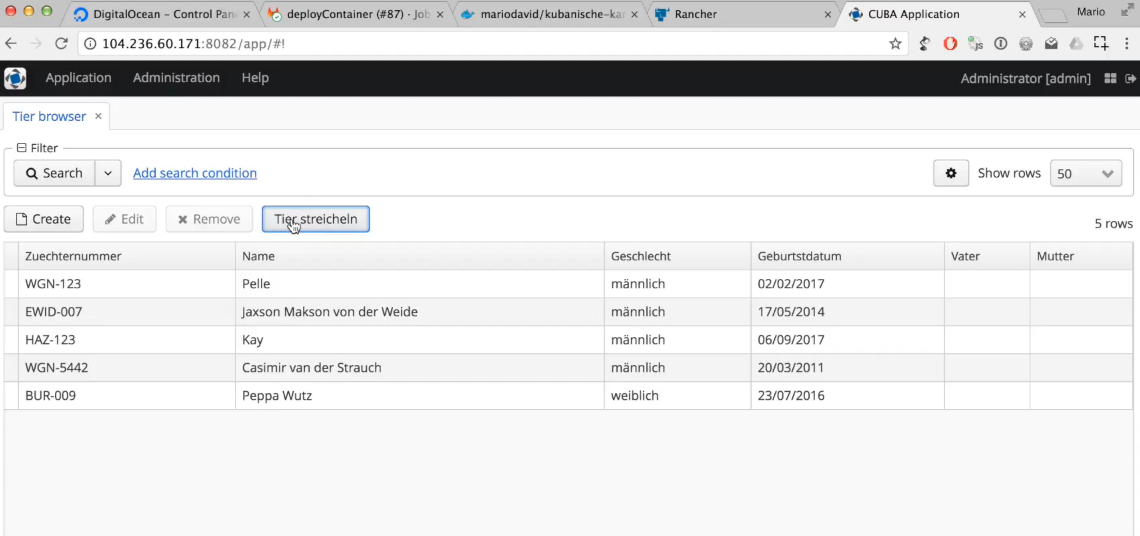
After pushing this change to the repository, the CD pipeline will get executed once again and after some waiting time, the app will be redeployed. To bullet proof it works, you can change some of the application code like in the file “tier-browse.xml”, you could add this to the “buttonsPanel” tag:
<buttonsPanel id="buttonsPanel"
              alwaysVisible="true">
    <!-- ... -->
    <button id="tierStreichelnBtn"
        caption="Tier streicheln" />
</buttonsPanel>
Just save the file, push your change and after the pipeline executed once again, the app is restarted and the button will appear on the UI.
Pick and choose between automatic and push-button deployments
the last part that I want to show to you is the possibility to decide between automatic deployments (which we saw earlier) and push-button deployments. To execute jobs in the pipline with a click of a button makes sense when you e.g. do not want that deployment to production to happen automatically. Perhaps you have some kind of QA process in place which should get executed before pushing to production.
In this case, you can change the “deployContainer” job in the .gitlab-ci.yml the following way:
deployContainer:
  when: manual
This will enable a play button on the UI of Gitlab so that a Human is in charge of the deployment process.
Summary
With this we are at the end of this CI/CD journey. It turns out that creating a fully fletched CI/CD pipeline as well as a “production” environment is just a few docker commands away. Although it is ofentimes good to go for SaaS offerings, depending on your setting and environment this might not be appicable.
What we have seen here is a way to either run your own stack in the Cloud while controlling the data. The process to run this on your own hardware in your datacenter is 95% the same due to the abstractoins we used.
Also to make the CD pipeline more advance, with more stages e.g. this can be done by adding another job in the ci description file and before that creating another stack in rancher manually. From now on the process is very easy and fast to achieve.
To close this off, I hope you had a good time reading this and have fun playing with Gitlab & Rancher.
As always, if you have any thoughts, ideas and or opinions especially on the Youtube videos I’d love to hear from you.