CUBA on Kubernetes - Part 1
Kubernetes has become the de-facto standard when it comes to doing container scheduling & orchestration. Since it is so omnipresent these days, let’s have a look on how to deploy a CUBA application into a Kubernetes cluster. This first part deals with creating the Kubernetes cluster infrastructure through Terraform.
Why to look at Kubernetes
When it comes to deployment of an application living in a docker container, a lot has changed in the recent year. Back in 2016 when I wrote another container-related blog post series dealing with running CUBA on ECS - the proprietary elastic container service from AWS, the container orchestration wars were at their all-time highs. Back then the main competitors were Docker Swarm & Apache Mesos. But even at that times Kubernetes already stood out for its great and vibrant community.

Fast forward to end-2018 - Kubernetes has mainly got adopted by all major cloud vendors, which have hosted Kubernetes offerings and took Kubernetes more or less as the basis for their container workloads. Also, the Ecosystem around Kubernetes itself as well as the CNCF in general is very mature and growing like crazy.
But not only that, also previous competitors like Openshift and Rancher (or at least software solving similar problems) switched to Kubernetes as their underpinning. Additionally, a lot of CI/CD tools like Gitlab or GoCD and even Jenkins have a tight integration into Kubernetes as their platform for deploying applications through the pipeline.
There are many voices saying that in comparison to PaaS which never got the popularity and adoption to become ubiquitous in the deployment sphere, Kubernetes is on its way to become THE common abstraction for deployment and infrastructure.
This all leads me to take a deeper look into Kubernetes. As a real-life example of how to interact with Kubernetes, we will take a look on how to deploy & run a CUBA application to Kubernetes.
Step 0: selecting a compute provider
In order to get up and running with Kubernetes, we have to choose which compute provider should be used. Kubernetes, in general, can run on premise as well as in the cloud. Since setting up (as well as maintaining) a Kubernetes cluster can be a challenging task, most of the cloud providers offer a hosted environment for Kubernetes.
Normally this means, that the only resources that the user has to care about are the worker nodes. The cluster management is taken care of by Google, AWS, Digitalocean, Azure and so on. In this tutorial, we will leverage the Google Kubernetes Engine (GKE) in order to setup our Kubernetes cluster.
Just to remember - compared to the AWS ECS blog post series I did, the main difference is that with Kubernetes you do not lock in into a particular vendor and its proprietary container orchestrator.
Instead, you have a certain lock-in into an open source tool, which still is a lock-in, but it is much more universal. As I said earlier, you have the freedom of choice on which Cloud provider you want to run Kubernetes, hosted or self-managed, on premise, in the cloud or even on the edge.
This means that the choice of GKE as the provider for the Kubernetes cluster is more or less irrelevant compared to picking ECS, because you can pretty much lift & shift your Kubernetes workloads from one cloud provider to another.
Step 1: setting up a Kubernetes cluster on GKE
But as we have to pick one - we will use GKE in this blog post. This means that you have to prepare certain stuff for using it. In the quick-start guide you will find all relevant information on how to create an account, create a project and install the command line tools.
What is also relevant for this blog post is the installation of Terraform. Terraform is a tool which allows describing infrastructure declaratively in a infrastructure as code style. This allows us to instead of creating the cluster through the Google cloud API / CLI / UI directly, describe the cluster through Terraform. With the description, Terraform will then go ahead and do the heavy lifting of the interaction with the cloud provider.
Using Terraform has the same advantages regarding reducing the vendor lock-in. Although it does not hide away the feature of a concrete cloud provider (as Kubernetes somewhat does), it still homogenizes the syntax of managing infrastructure resources. Compared to programmatic tools like Chef or puppet, Terraform takes a declarative approach in order to describe the destination state of the infrastructure.
In order to let Terraform interact with the Google Kubernetes API, we need to enable this in the Google cloud console. After the Kubernetes API is activated for this project, the only thing left before starting off with Terraform is to create a JSON-based Token for Terraform to authenticate. In the “Credentials” section of the console, choose “Create Credentials” and then “Service account key”. In the selection for “Service account” you can choose “Compute Engine service account”. Use Key Type “JSON”. This will give you a JSON file which contains all necessary information to connect to GKE via Terraform.
Creating a GKE cluster through Terraform
Once everything is setup, let’s create the Kubernetes cluster. As an example of doing that, I created a repository which contains the infrastructure code for this blog post: cuba-on-kubernetes-infrastructure.
It uses an existing Terraform module called kubernetes-engine which will create a Kubernetes cluster for GKE on our behalf. It will more or less take away another set of heavy lifting operations from us.

Terraform modules are a way to encapsulate certain infrastructure resource definitions through an abstraction mechanism with its own API. It allows you to define modules for reoccurring patterns of infrastructure that should be used. The Terraform module registry then is an easy way to share common terraform modules just like the Docker registry for container images.
module "cuba_on_kubernetes_cluster" {
  source = "google-terraform-modules/kubernetes-engine/google"
  version = "1.15.0"

  general = {
    name = "cuba-on-kube"
    env  = "prod"
    zone = "europe-west1-b"
  }

  master = {
    username = "admin"
    password = "${random_string.password.result}"
  }

  default_node_pool = {
    node_count = 3
    remove     = false
  }

}
When we look at this usage of the module, we find certain parameters that we can pass into the module. In the general section, you can define the name of the cluster, the environment, and the zone the cluster should be located in.
Then there are some other options which can be configured, but I will not go through them right now. This can be looked up in the documentation of this module.
To create a terraform resource, you should start with a terraform plan in order to do a dry run of what would be changed.
The actual creation happens through terraform apply. The output of this will look something like this:
$ terraform apply
data.google_container_registry_repository.registry: Refreshing state...
data.google_container_engine_versions.region: Refreshing state...

An execution plan has been generated and is shown below.
Resource actions are indicated with the following symbols:
  + create

Terraform will perform the following actions:

  + random_string.password
      id:                                                                 <computed>
      length:                                                             "16"
      lower:                                                              "true"
      min_lower:                                                          "0"
      upper:                                                              "true"

  + module.cuba_on_kubernetes_cluster.google_container_cluster.new_container_cluster
      id:                                                                 <computed>
      addons_config.#:                                                    "1"
      addons_config.0.horizontal_pod_autoscaling.#:                       "1"
      zone:                                                               "europe-west1-b"


Plan: 2 to add, 0 to change, 0 to destroy.

Do you want to perform these actions?
  Terraform will perform the actions described above.
  Only 'yes' will be accepted to approve.

  Enter a value: yes

random_string.password: Creating...
  length:      "" => "16"
  upper:       "" => "true"
random_string.password: Creation complete after 0s (ID: {DMghSqRU)S:4rgS)
module.cuba_on_kubernetes_cluster.google_container_cluster.new_container_cluster: Creating...
  addons_config.#:                                                    "" => "1"
  addons_config.0.horizontal_pod_autoscaling.#:                       "" => "1"
  node_config.0.preemptible:                                          "" => "false"
  node_config.0.service_account:                                      "" => "default"
  node_config.0.workload_metadata_config.#:                           "" => "1"
  zone:                                                               "" => "europe-west1-b"
module.cuba_on_kubernetes_cluster.google_container_cluster.new_container_cluster: Still creating... (10s elapsed)
module.cuba_on_kubernetes_cluster.google_container_cluster.new_container_cluster: Still creating... (20s elapsed)
module.cuba_on_kubernetes_cluster.google_container_cluster.new_container_cluster: Still creating... (2m20s elapsed)
module.cuba_on_kubernetes_cluster.google_container_cluster.new_container_cluster: Creation complete after 2m24s (ID: cuba-on-kube-prod-europe-west1-b-master)

Apply complete! Resources: 2 added, 0 changed, 0 destroyed.
Note that I removed some of the output from Terraform. Mainly you can look at the different resources that will be created and confirm this by typing in “yes”.

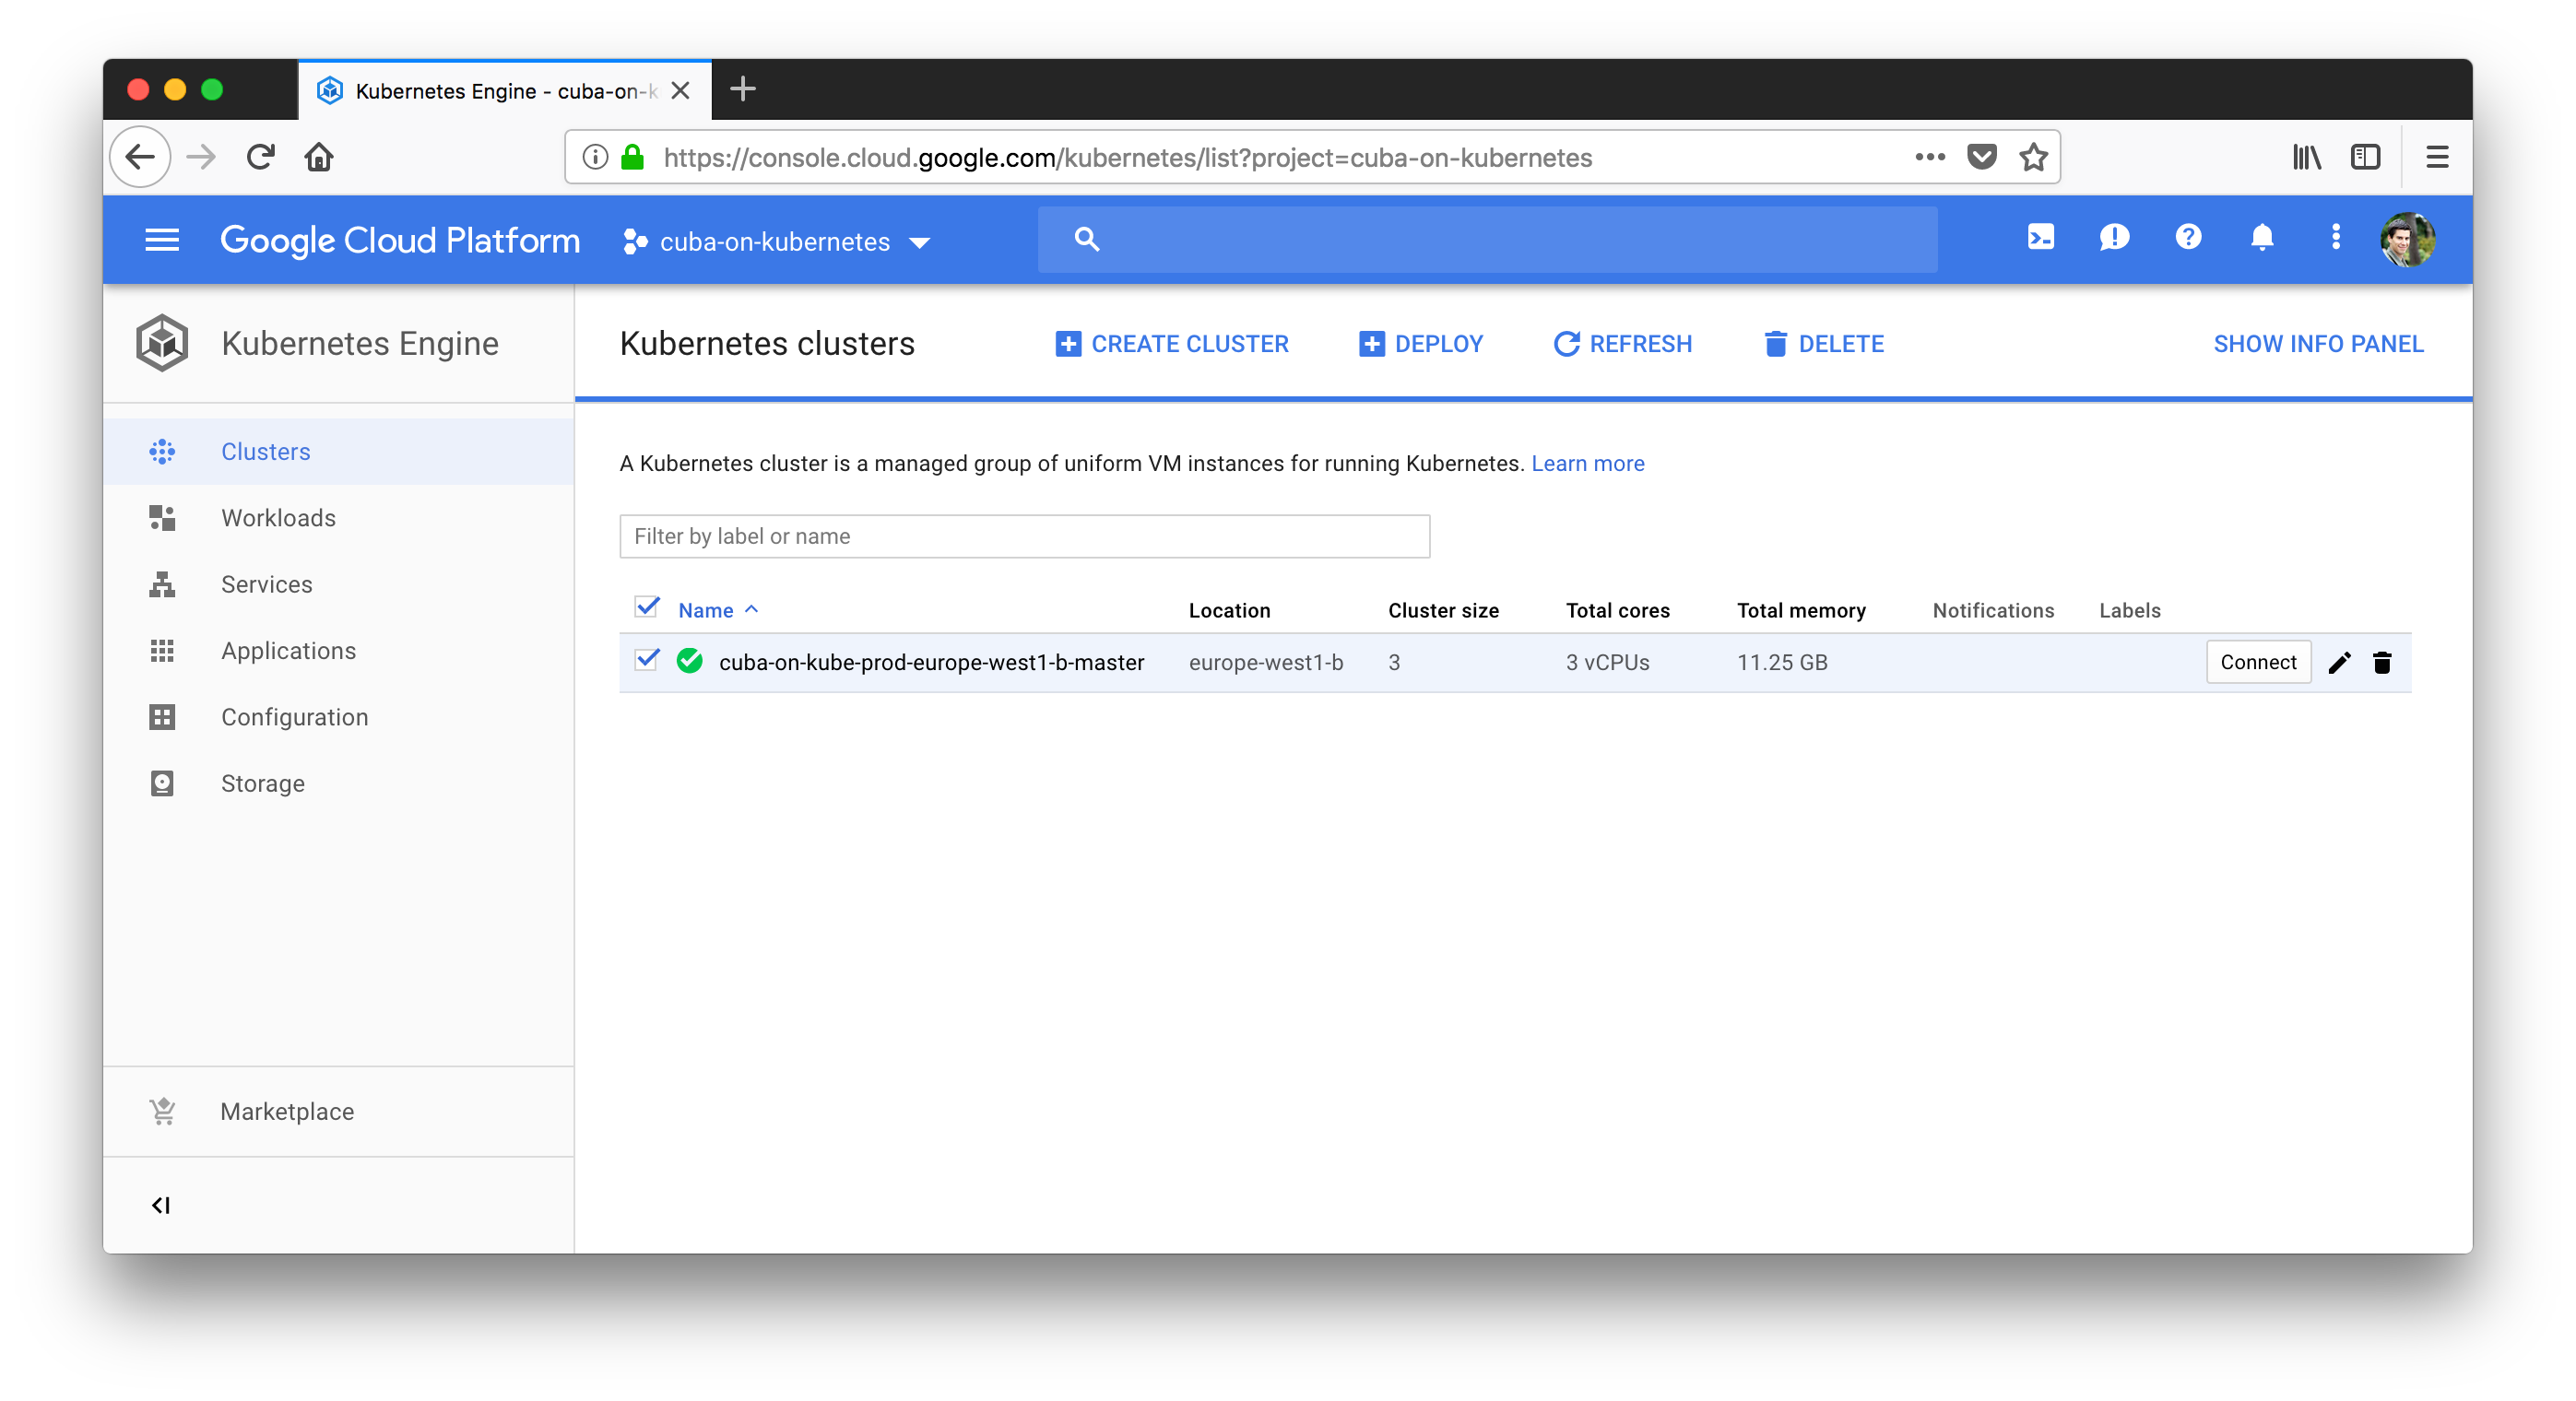
Look at the created cluster
After the successful creation of the GKE cluster, you can take a look at the Google cloud console UI in order to see your cluster.
Connect to Kubernetes with “kubectl”
Another way to see what has happened is to use the kubectl command to connect to the Kubernetes cluster and list all the nodes. In order to do that, we need to point kubectl to the correct Kubernetes cluster in GKE. Let’s do that:
In the Google cloud console, there is a button called “connect” which will give you a terminal command for gcloud that will configure kubectl for this cluster. It looks something like this (depending on the names of your cluster):
$ gcloud container clusters get-credentials cuba-on-kube-prod-europe-west1-b-master --zone europe-west1-b --project cuba-on-kubernetes

Fetching cluster endpoint and auth data.
kubeconfig entry generated for cuba-on-kube-prod-europe-west1-b-master.
Next thing is, that you can use kubectl to connect to the cluster and get some metadata from it like:
$ kubectl get nodes
NAME                                                  STATUS    ROLES     AGE       VERSION
gke-cuba-on-kube-prod-eu-default-pool-0db2146e-7w5l   Ready     <none>    16m       v1.10.6-gke.1
gke-cuba-on-kube-prod-eu-default-pool-0db2146e-fn57   Ready     <none>    16m       v1.10.6-gke.1
gke-cuba-on-kube-prod-eu-default-pool-0db2146e-jz85   Ready     <none>    16m       v1.10.6-gke.1
With this in place, you successfully created a GKE cluster through Terraform and are ready to go to the next step.
Step 2: Create PostgreSQL database in Google cloud
In order to run the CUBA application, we need a working RDBMS system at our fingertips. It is possible to run a postgres instance directly on Kubernetes via Stateful Sets.
However, I will not go down this route and instead push all the heavy lifting down to Google and let them deal with all the operations of running a production database. As other Cloud service providers Google has an offering for that called Google Cloud SQL, which comes in flavors MySQL or PostgreSQL. In this case we will use PostgreSQL.
Create SQL DB resources via terraform
We will use Terraform once again to create the resource and in particular another terraform module called sql-db.
module "postgres-db" {
  source           = "GoogleCloudPlatform/sql-db/google"
  name             = "cubarnetes-postgres"
  database_version = "POSTGRES_9_6"
  db_name          = "postgres"
  region           = "europe-west1"
  user_name        = "postgres"
  user_password    = "4d86PPg$P-Cu%8hR"
}
Create the resources via terraform plan and you should see the result in the Google Cloud SQL console.

Connect GKE to Cloud SQL
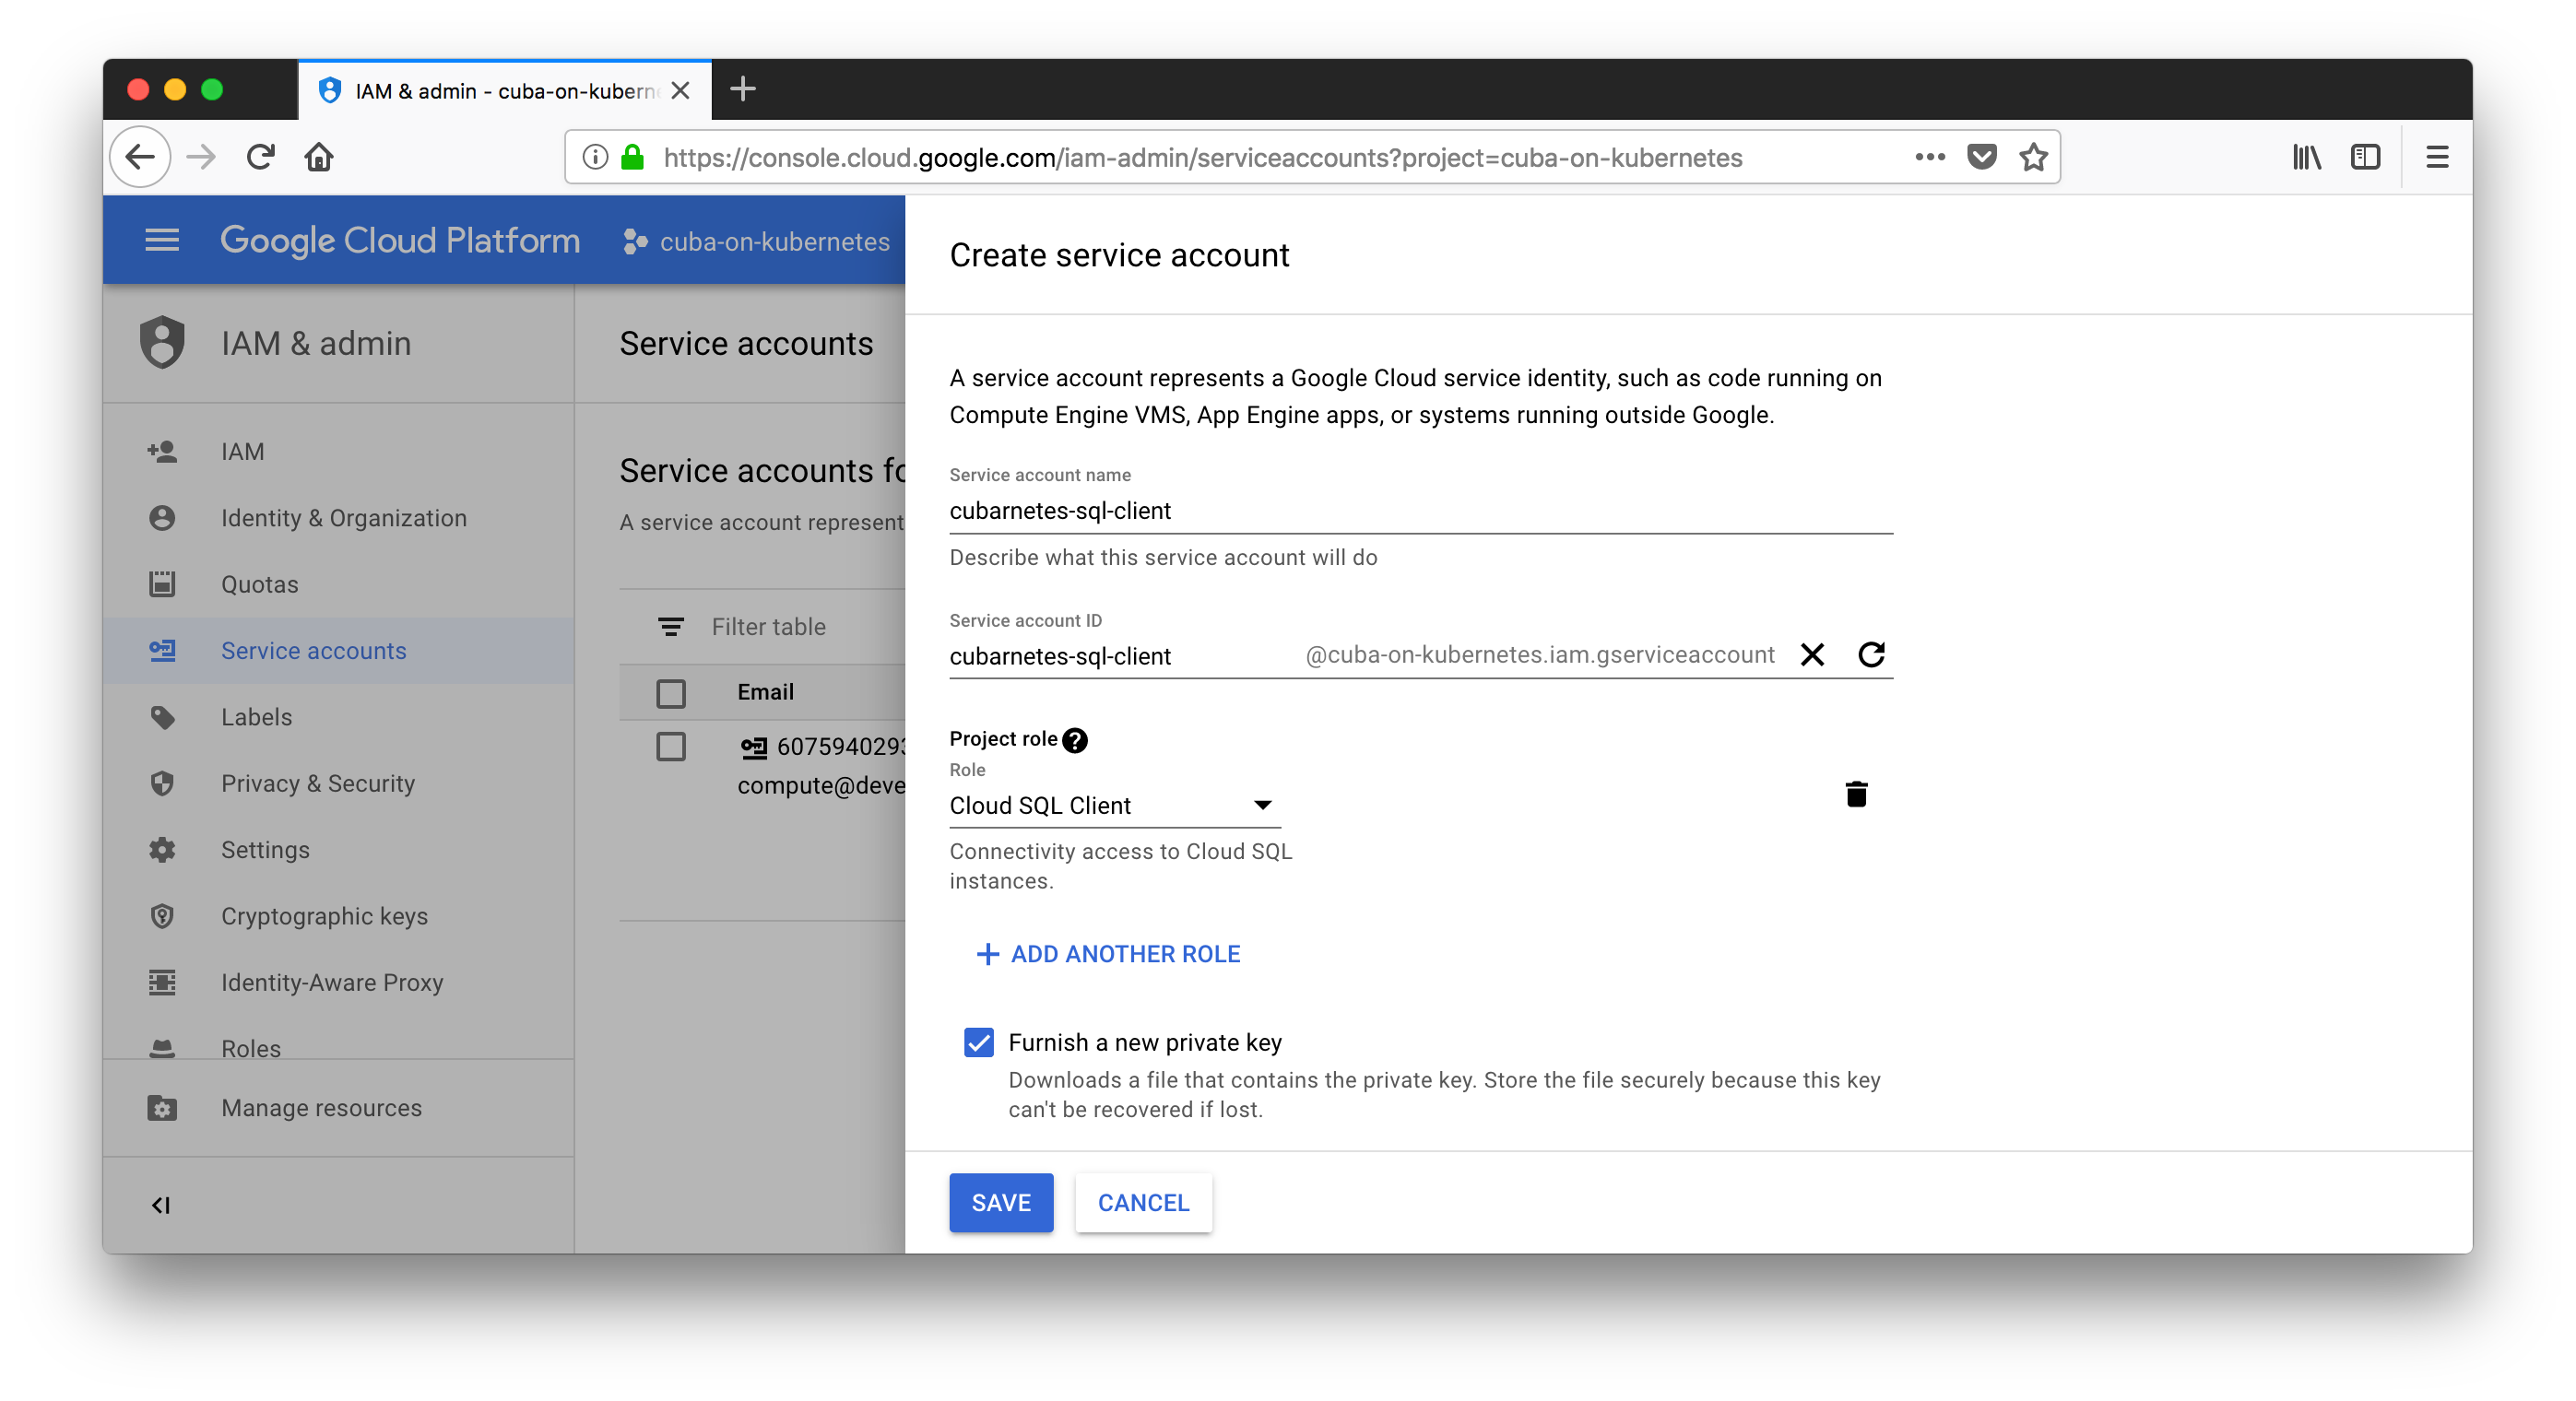
The SQL instance is up and running. The remaining part is to allow the GKE containers to access the postgres instance. Google has a documentation for that: Cloud SQL - connect GKE.
First thing is that we need a Service account. This is possible via the Google cloud console (also through Terraform, but I will use the UI way for now and leave it up to you to also do that in TF):
The downloaded private key needs to be stored securely. It is used for later reference.
Before that, we also need a user for the SQL database. It can e.g. be created via the gloud command line tool:
$ gcloud sql users create proxyuser host --instance=cubarnetes-postgres --password=4d86PPg$P-Cu%8hR
WARNING: Positional argument deprecated_host is deprecated. Use --host instead.
Creating Cloud SQL user...done.

Created user [proxyuser].
For the next steps we need the “connectionName” of the SQL instance, so let’s grep this via gloud:
$ gcloud sql instances describe cubarnetes-postgres | grep connectionName
connectionName: cuba-on-kubernetes:europe-west1:cubarnetes-postgres
Expose credentials to Kubernetes via Kubernetes secrets
The above downloaded private key is now used for the next step: to add this information securely to the Kubernetes cluster as a secret (where cuba-on-kubernetes-pk-1c5174bb7e33.json is the name of the downloaded PK file):
$ kubectl create secret generic cloudsql-instance-credentials \
    --from-file=credentials.json=cuba-on-kubernetes-pk-1c5174bb7e33.json
secret/cloudsql-instance-credentials created
Also we store the username and password as a Kubernetes secret:
$ kubectl create secret generic cloudsql-db-credentials \
     --from-literal=username=proxyuser --from-literal=password=4d86PPg$P-Cu%8hR
Now GKE knows about the secrets for the Google Cloud SQL instance and everything is setup correctly so that we can connect it with the Google Cloud SQL instance. We can verify that the secrets are stored in the Kubernetes cluster via:
$ kubectl get secrets
NAME                            TYPE                                  DATA      AGE
cloudsql-db-credentials         Opaque                                2         7s
cloudsql-instance-credentials   Opaque                                1         13m
default-token-nfh7r             kubernetes.io/service-account-token   3         5h
Summary
In this first part of the CUBArnetes series, we mainly talked about the infrastructure side of things. In recent years it has become comparably simple to create those infrastructures through the rise of cloud computing and their various mechanisms to create & manage different infrastructure artifacts like databases and so on.
Still, there is some work to do because even this infrastructure has to be defined and at least configured at a high level. Terraform does a great job on this angle. With Terraform we describe infrastructure in a declarative way. It will deal with all the necessary API calls to the cloud providers and the module mechanism gives us a PaaS like abstraction for creating infrastructure dependencies.
Now that the infrastructure is ready to be used and all the dependencies are in place, the next part deals with deploying the application onto the running cluster.