API integration in CUBA with Xero
In this blog post we will discover how to integrate with a SaaS software solution like Xero. For those kinds of integrations, there are two main ways to achieve it - API and SDK based. We will compare both approaches and take a look at the concrete integration steps to take.
What is Xero
Xero is an online accounting solution. It also offers certain features around banking, invoicing as well as inventory management. I will not go into more detail, because in this blog post we want to concentrate on the API integration and not so much around the feature set of this particular SaaS vendor.
Integration options
Nowadays almost all SaaS products have an Abstract programming interface (API) in order to communicate with them through your own applications automatically. Oftentimes those solutions have an API as well as an SDK which is wrapping and making the API nicely accessible to the developers in their programming language of choice.
So an Integration-API is oftentimes a protocol-based communication mechanism like HTTP. There you have certain endpoints that you can use in order to achieve your automation purposes.
Since the term API is so overloaded, it is also sometimes meant to be an abstraction within a programming language / operating process and so on. For this blog post, we will use the term “API” as a protocol (HTTP) based integration mechanism, while the term “SDK” means a non-protocol based integration mechanism like a set of classes/functions that can be used within a programming language to interact with.
API integration with Xero
In the case of Xero, there are plenty of API endpoints for the different business cases like:
- https://api.xero.com/api.xro/2.0/banktransactions
- https://api.xero.com/api.xro/2.0/contacts
- https://api.xero.com/api.xro/2.0/employees
Data can be fetched and or changed & stored via sending HTTP messages to those endpoints. The data that needs to get send is different for the different use cases. Oftentimes with an HTTP-based API you have to use the different HTTP verbs for the different cases.
As a prerequisite, it is required to authenticate against the API. This is a little bit different from API to API. Sometimes a username & password combination is sufficient, sometimes a token-based approach has to be used.
In the case of Xero, they differentiate between different applications that you want to create. A Xero application is, in this case, a representation of your application on the Xero service itself, that you register on their site for every integration application that you want to build. They have classified those applications into “private”, “public” and “partner”. You can read more about that concept in their docs around API application types.
When you want to have a private app connecting to Xero, an OAuth-based authentication with a public/private key combination is required to interact with the SaaS. In this blog post we will use a private app, so the corresponding authentication workflow will be used.
SDK integration with Xero
As stated above, sometimes the SaaS vendor offers an additional SDK for integration. An SDK is normally using the same mechanisms from the API as described above like HTTP communication. What it additionally does is create a programming language library that can be used directly as classes/function within the application of the app that wants to integrate with the SaaS.
In the case of Xero, they have plenty of SDKs for common programming languages like Java, JavaScript, C#, PHP and so on.
The main benefit of using an SDK is that the vendor removed some of the heavy liftings for the integration application developer and encapsulated the interaction protocol (for example for the authentication) into the SDK.
Difference between SDK and API by example
As an example, let’s take a look at the authentication workflow against Xero with a private app.
On the API layer, you have to understand how OAuth works in general, what particular flavor they use in this case, understand how to sign a request and so on.
On the SDK layer, Xero has mostly removed the necessity to understand all of this. Instead, they created a Java / Javascript / C# function or object which has a particular interface with particular parameters. The surface area, in this case, is much smaller, so the integration effort oftentimes becomes easier.
But there are downsides as well to the SDK approach. Let’s just imagine that you want to log all your HTTP requests from your application in a particular form into your central logging system in order to reason about problems that might occur during production.
In this case, you might want to control what data you want to log, which form and shape it has and so on. With a direct API integration, this is not only totally possible but also up to you, because you write the HTTP interactions anyways. You can decide which HTTP library you want to use, where to log which information and so on.
Since in the SDK case all of the network calls are hidden away from you as a developer, you have fewer options to change the way the interaction works.
This has to be kept in mind when using an SDK-based integration approach.
For this blog, post we will stick to the SDK-based integration and live with the fact that we do not have the full control over the protocol interaction that occurs during the integration. Furthermore, we leverage this fact and have an easier integration due to it.
Integration implementation with Xero
Now that we have talked about the general approach on how to integrate with a SaaS provider like Xero, let’s dig into the details of how to implement the actual integration.
mariodavid/cuba-component-xero
mariodavid/cuba-example-using-xero
Adding the Xero SDK dependency
The first thing that we need to do since we want to use their Java SDK is to add the maven dependency to our project. Most of the libraries nowadays are available via a maven repository, so getting the actual source code is pretty easy:
The build.gradle file first needs to know their maven repository.
According to their docs we have to add the following maven repositories to our application:
buildscript {

    repositories {

        maven { url "https://raw.github.com/XeroAPI/Xero-Java/mvn-repo" }
        maven { url "https://raw.github.com/XeroAPI/XeroAPI-Schemas/mvn-repo" }

        // ...
    }
}
Next is to add the maven dependency and decide where we want to put it in our CUBA application (component). Since CUBA is a multi-module gradle project (like “global”, “core”, “web”) where the different modules play different roles in the application architecture, which module actually needs access to the SDK.
Normally, such integration logic should be placed in the “core” module because this is where normally all backend operations are executed and only a subset is exposed through a service interface to the other modules.
However: as it turns out when we want to achieve the merge of the two configuration approaches from Xero & CUBA, it is required to have also access to the sources of the SDK in the global module (we will more of that later). Therefore I added the dependency to the “global” module:
configure(globalModule) {
    // ...

    dependencies {
        compile 'com.xero:xero-java-sdk:1.0.9'
    }
    // ...

}
Note: Since the “global” module is a dependency of the “core” module, the sources from Xero are also available in the “core” module transitevely. This is a little bit implicit but is the default way of working. In case you want to have it a little bit more explicit, you can add a dependency to the “core” module as well.
Once this “infrastructure” work is done, we can use the Xero classes from our own source code. Let’s get on with taking a look on how to setup the Xero configuration.
Merging the Xero configuration with the CUBA world
The SDK needs some kind of configuration parameters in order to take away some of the heavy lifting of the authentication. Also, the SDK allows us to configure different HTTP communication options.
The default Xero SDK configuration approach is that those configuration options are defined in a file called “config.json” that has to be placed at the root directory of your source code tree.
This way of doing it is not very common for Spring applications (as CUBA is), because Spring has certain defaults where to put configuration options in general. CUBA additionally adds other possibilities to the Table like the Database based Configuration options defined through an Interface definition.
Luckily the SDK is flexible enough for passing the configuration options to the SDK in other ways as well. When we take a closer look at the sources of the SDK, we find the main interaction point of the SDK called XeroClient which we finally want to use in order to communicate with the API.
The class has different constructors. One takes no parameters and uses the config.json config file. Another one takes the above mentioned com.xero.api.Config interface. This means that we are free to create an instance of the config interface and pass it in. How we create an instance of this interface - the SDK does not really care if we take this constructor.
The SDK already has an example of doing that via the SpringConfig example class, which will natively work with the Spring-based approach. However, as I said, I wanted to give the user the opportunity to change the settings on runtime via the “Application properties” UI of CUBA, which means I could not directly use this example.
Instead, I created the XeroConfiguration Configuration interface in the “global” module which looks like this:
@Source(type = SourceType.DATABASE)
public interface XeroConfiguration extends com.haulmont.cuba.core.config.Config, com.xero.api.Config {
@Override
@Property("xero.appType")
@Default("Public")
String getAppType();
@Override
@Secret
@Property("xero.privateKeyPassword")
String getPrivateKeyPassword();
@Override
@Property("xero.pathToPrivateKey")
String getPathToPrivateKey();
@Property("xero.privateKeyFileDescriptor")
FileDescriptor getPrivateKeyFileDescriptor();
@Override
@Secret
@Property("xero.consumerKey")
String getConsumerKey();
@Override
@Secret
@Property("xero.consumerSecret")
String getConsumerSecret();
@Override
@Property("xero.apiUrl")
@Default("https://api.xero.com/api.xro/2.0/")
String getApiUrl();
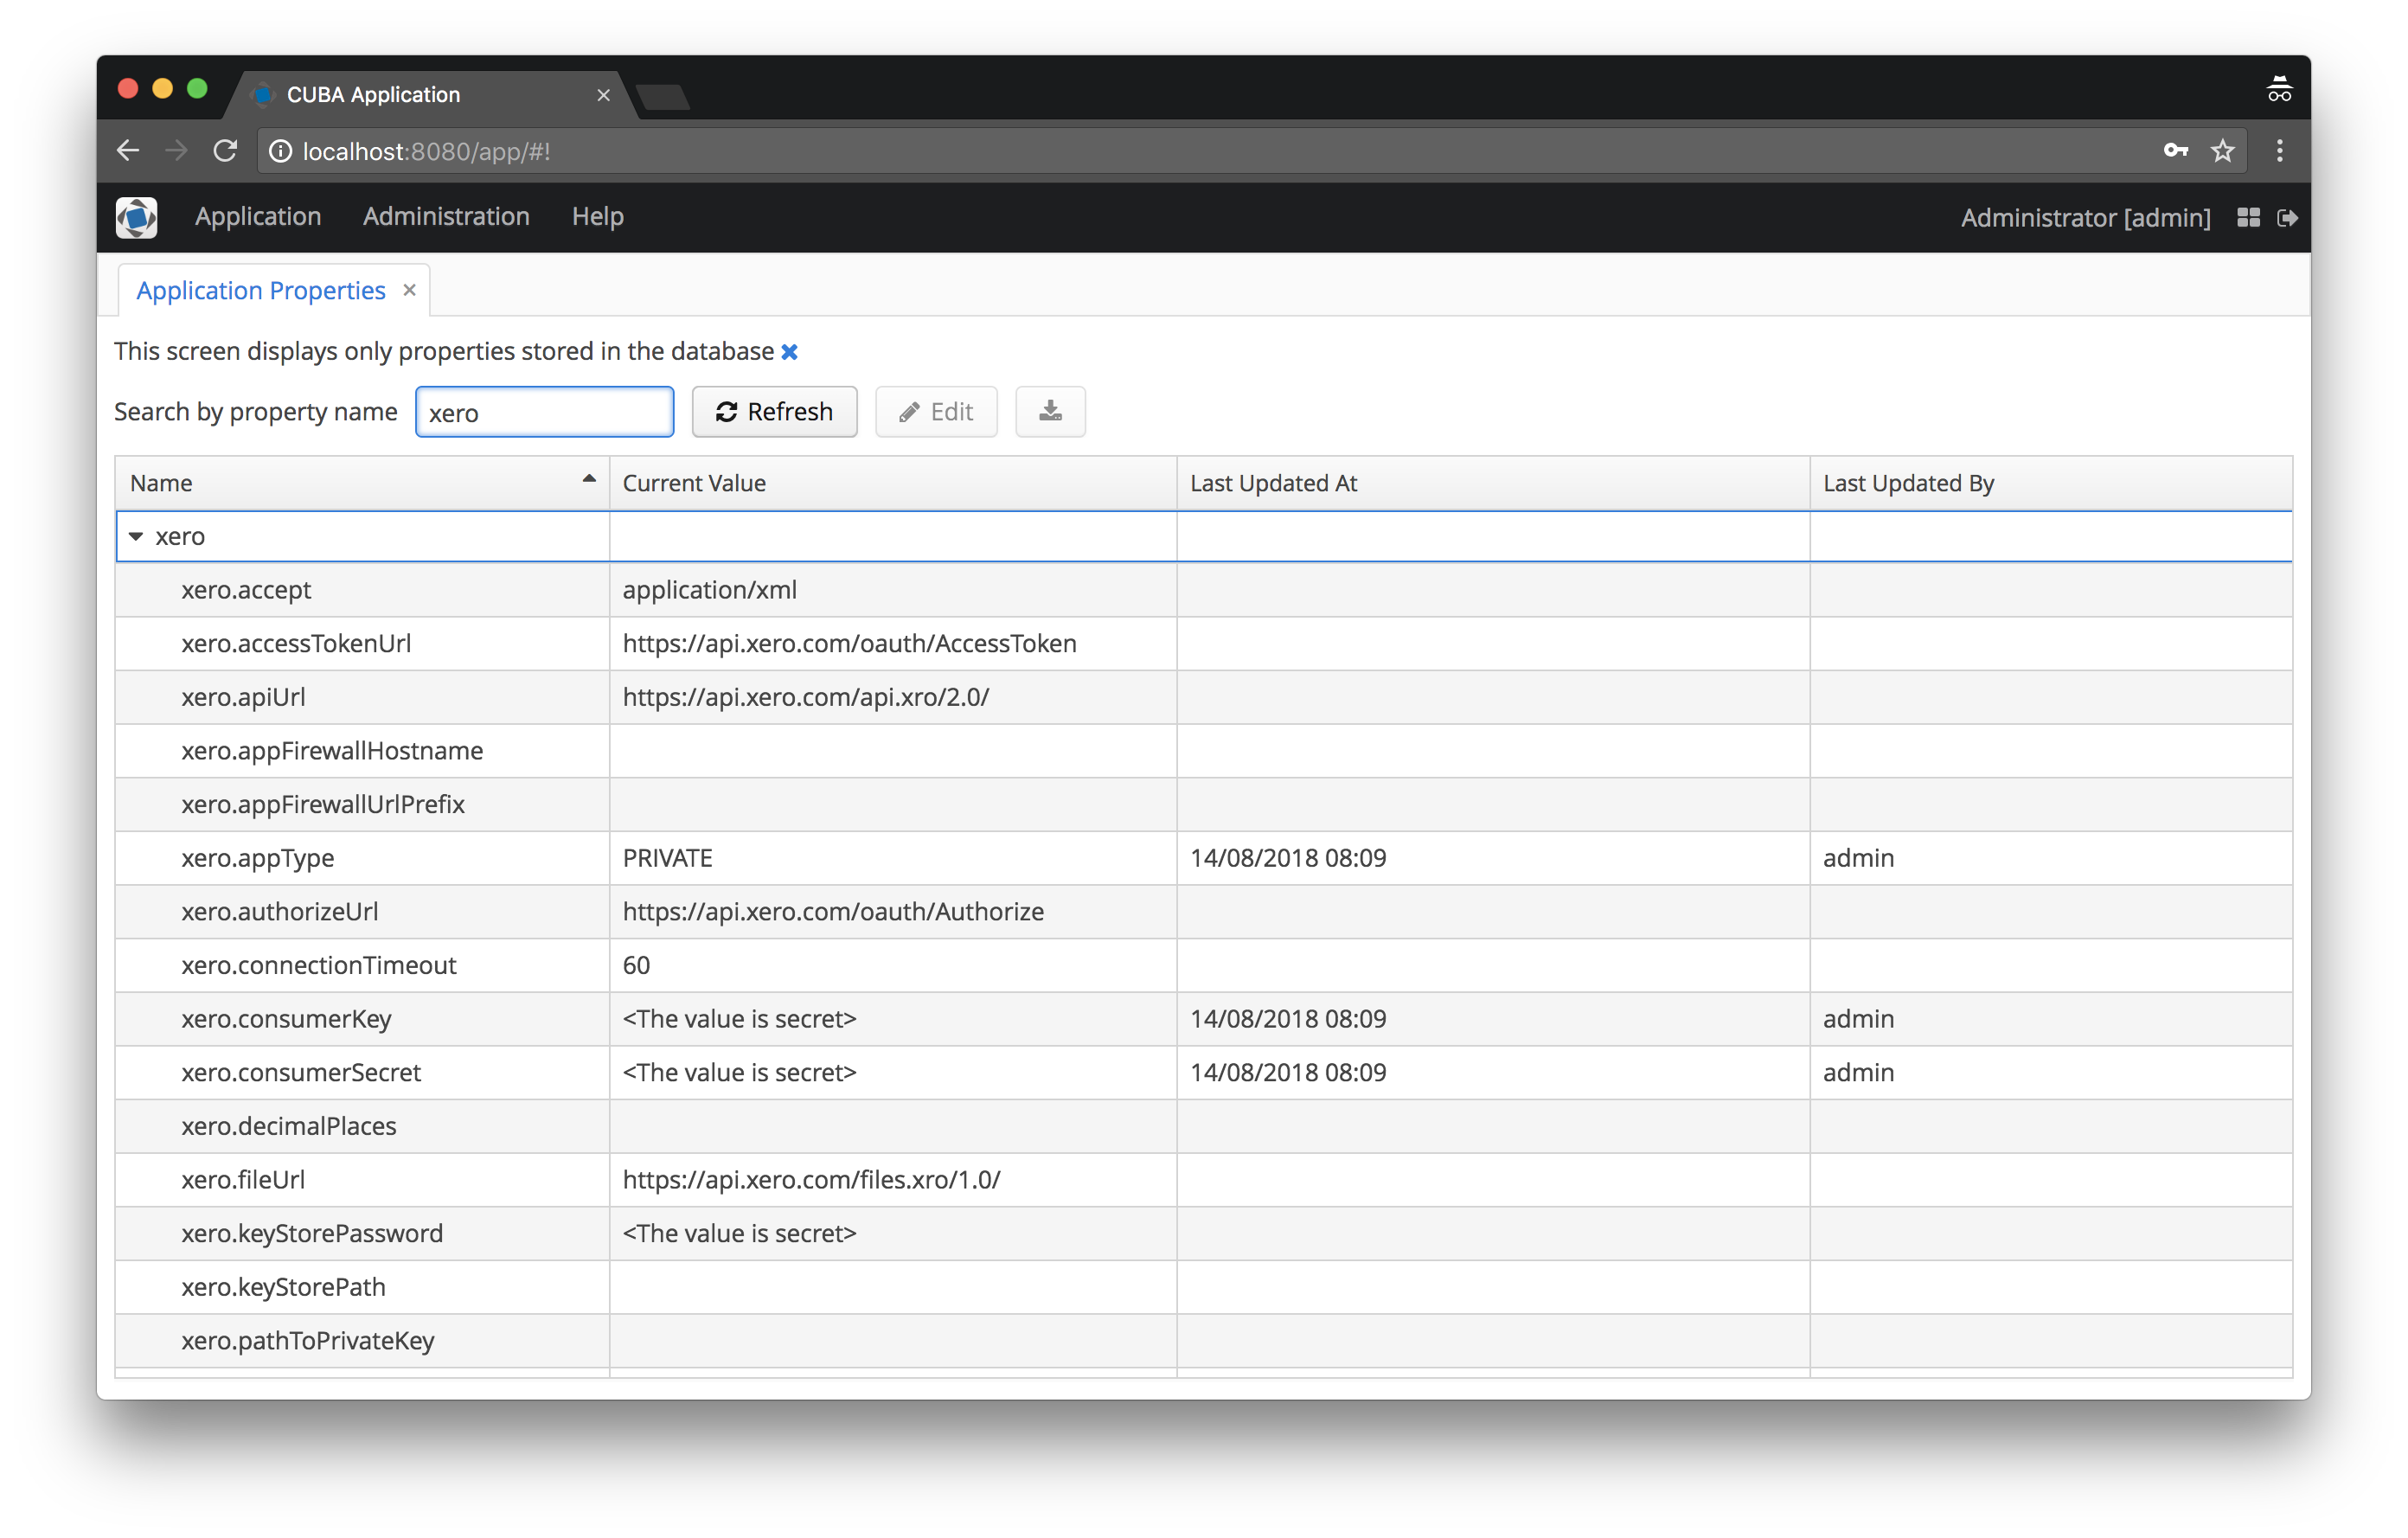
// ...In this interface I combined the two approaches. Through extending com.haulmont.cuba.core.config.Config we make it a regular CUBA config interface, where each getter method will become a configuration property in the UI.
Since the getter methods are also exactly the methods defined in the config interface of Xero, this circumstance makes the merging of the two approaches very easy.
The result in the configuration UI looks like this:
In order to retrieve this configuration interface, we can now just inject it into our Spring beans like this:
@Inject
XeroConfiguration xeroConfiguration
For ease of use I finally created a XeroClientFactory as a Spring component in the application component, which has a method public XeroClient createClient(). With this it becomes very easy to create an instance of a XeroClient. Internally it uses the above-mentioned constructor with the config reference.
Storing the personal private key in the CUBA application
The second major configuration setting for the Xero integration to work is to pass the private key file into the SDK so that the authentication can be done successfully.
As said above, it is required to create a public/private key pair and use it as a way to interact with the API. Using OpenSSL in the terminal the creation of the files looks like this:
openssl genrsa -out privatekey.pem 1024
openssl req -new -x509 -key privatekey.pem -out publickey.cer -days 1825
openssl pkcs12 -export -out public_privatekey.pfx -inkey privatekey.pem -in publickey.cer
The public key will be uploaded on the Xero website when creating the Xero application. The private part of the key (in particular the PKCS#12 or “.pfx” file) then needs to be used together with a password that has to be defined at key creation time to let the SDK sign the request with the correct information so that Xero can verify that the request comes from the expected caller.
By default, the config interface looks for a path to the private key file. Although this works in general, CUBA has an abstraction to get to resources easily with the Resources interface. Another option would be to use the “external files” feature of CUBA and store the file in the database.
It turns out that this is also achievable because the SDK is extensible in this way too. I will not go into more detail (see CubaConfigBasedSignerFactory for further information), but in the end, the application component accepts two ways of adding your private key file:
- in the conf directory of the application
- as an external file (FileDescriptor) through the UI
In the configuration there are the options which activate either of those approches:
- xero.pathToPrivateKey
- xero.privateKeyFileDescriptor
With that everything is in place to successfully connect to the Xero API. The last part is to look at how to use the SDK to actually get some data from the Xero API.
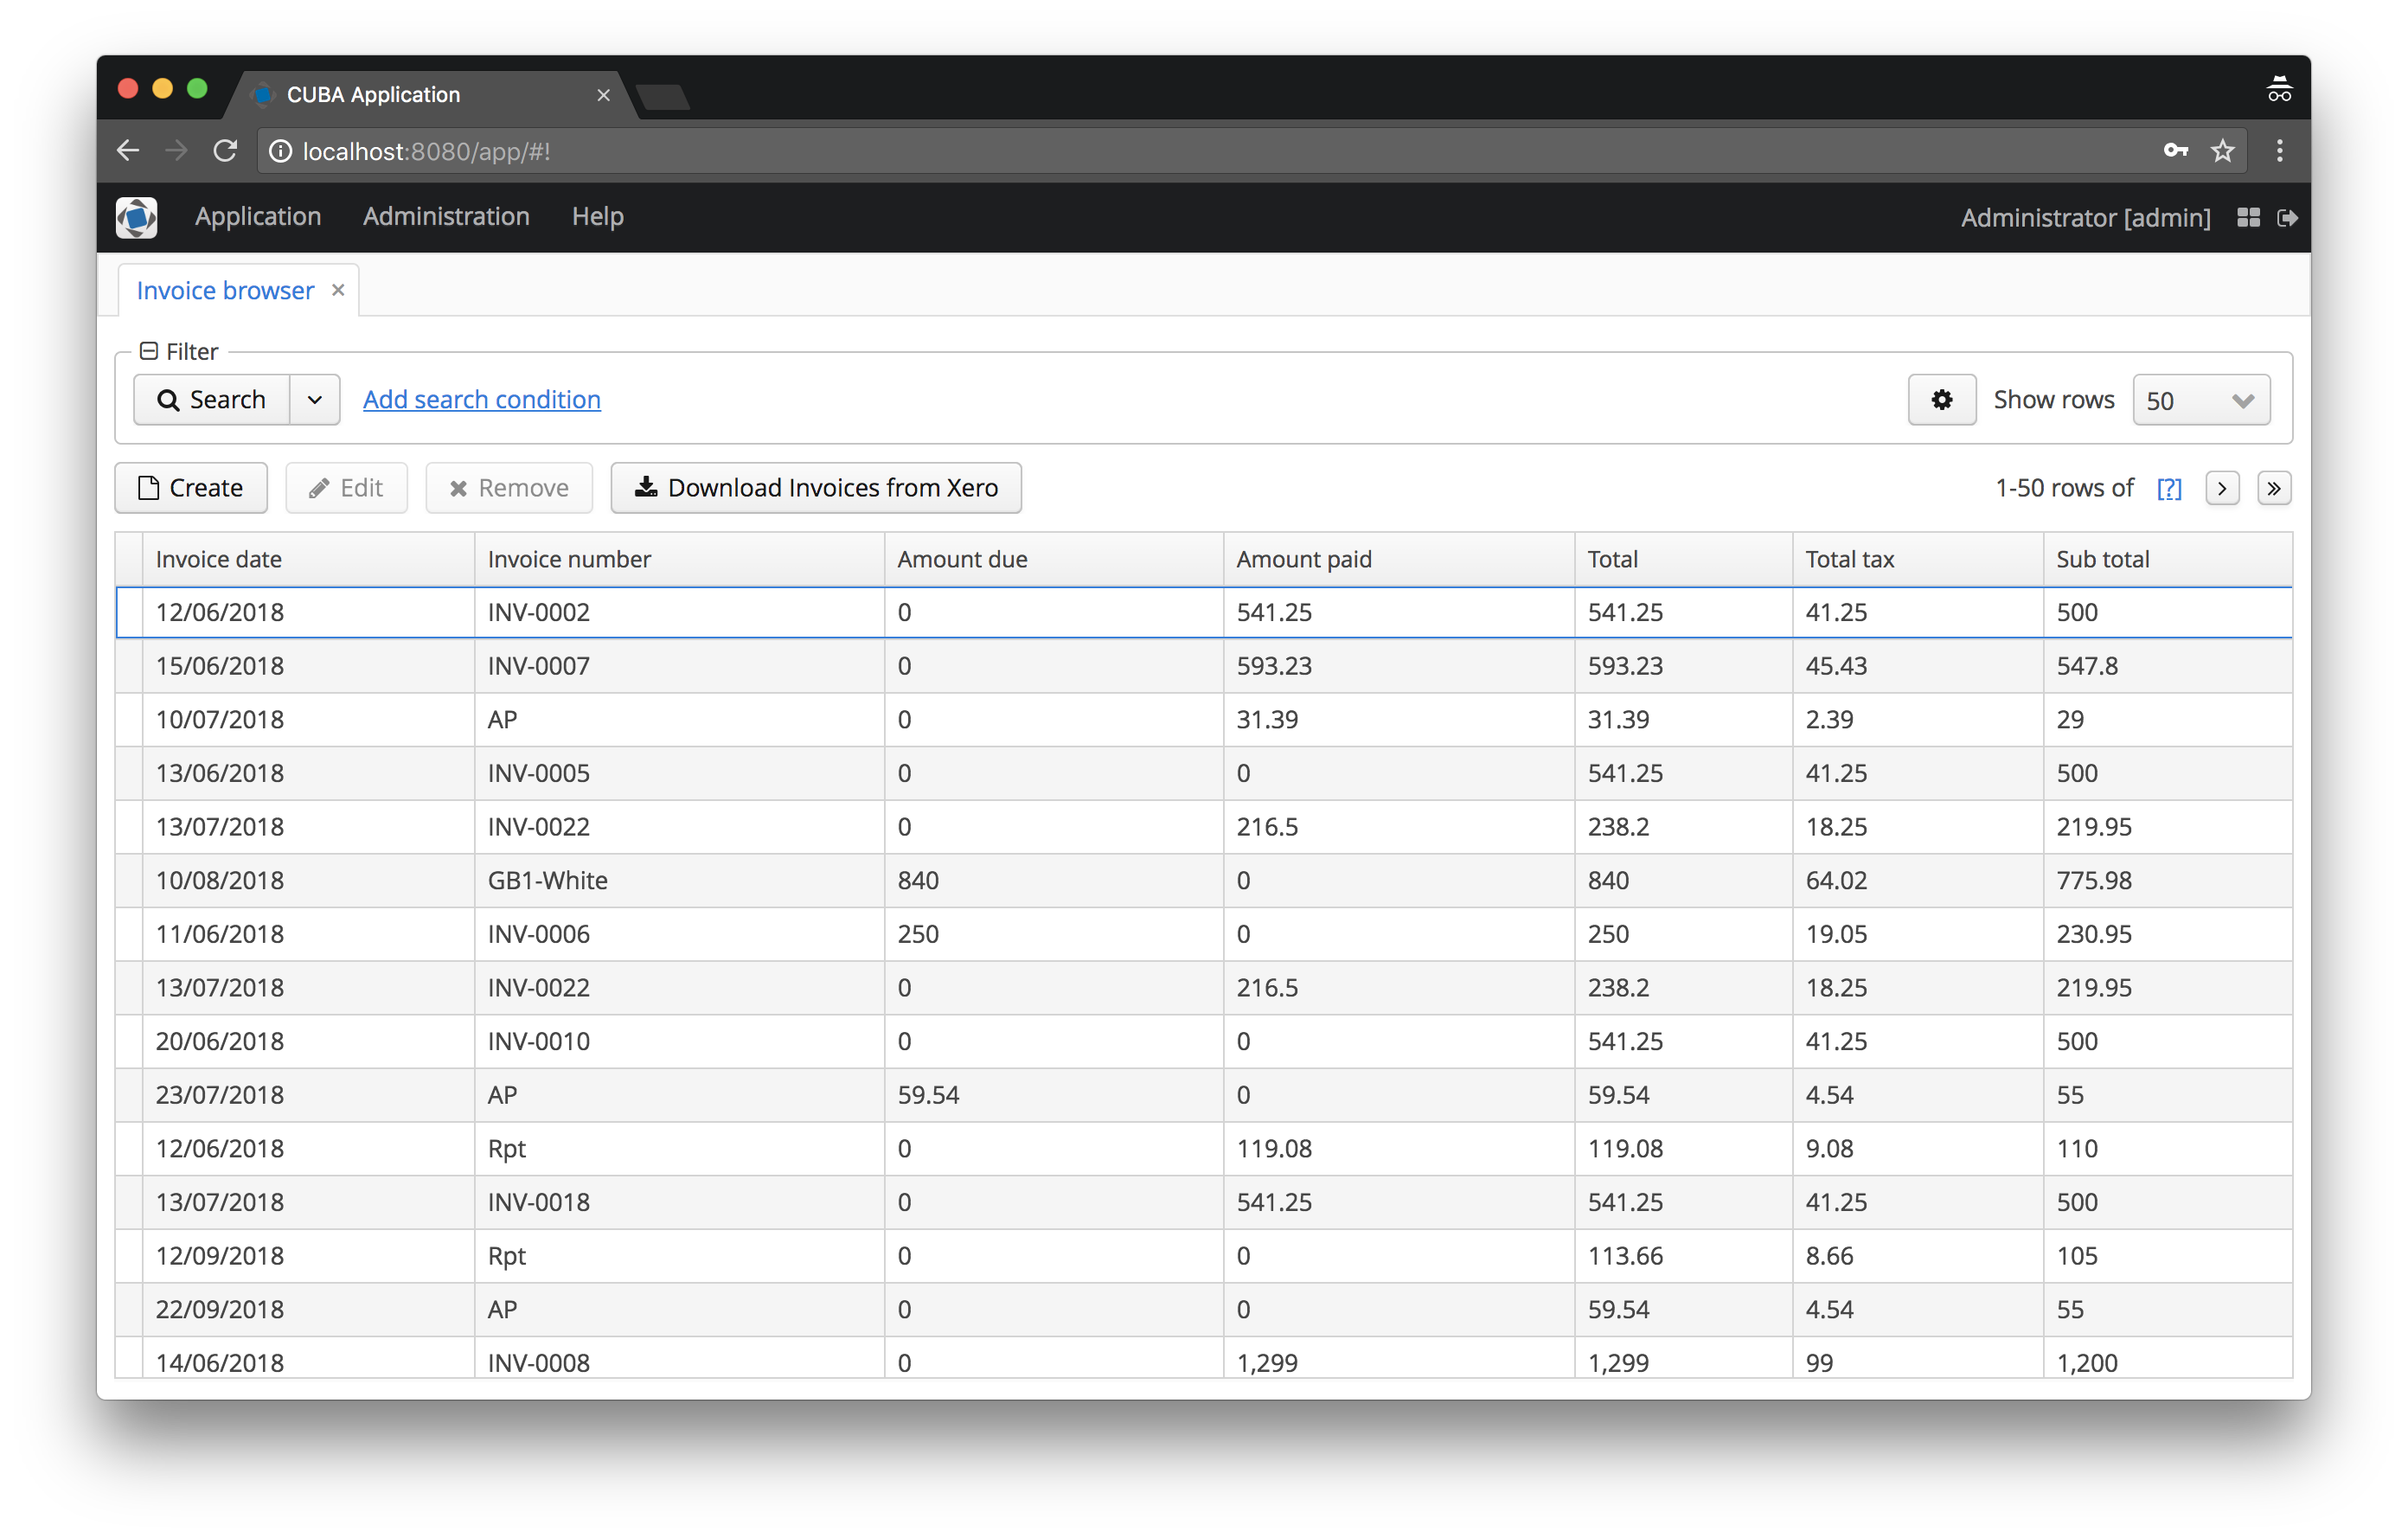
Using the xero application component
In the example application cuba-example-using-xero we can find a usage of the XeroClient in the XeroInvoiceService to retrieve some invoices from the API and store it in the CUBA application.
@Service(XeroInvoiceService.NAME)
public class XeroInvoiceServiceBean implements XeroInvoiceService {

    private static final Logger log = LoggerFactory.getLogger(XeroInvoiceServiceBean.class);

    @Inject XeroClientFactory xeroClientFactory;
    @Inject Metadata metadata;
    @Inject DataManager dataManager;

    @Override
    public boolean importInvoices() {

        XeroClient client = xeroClientFactory.createClient();

        try {
            List<com.xero.model.Invoice> xeroInvoiceList = client.getInvoices();

            persistXeroInvoices(xeroInvoiceList);
        } catch (IOException e) {
            log.error("Error while retrieving Invoices from Xero.", e);
        }
        return true;
    }

    private void persistXeroInvoices(List<com.xero.model.Invoice> xeroInvoiceList) {

        for (com.xero.model.Invoice xeroInvoice : xeroInvoiceList) {

            Invoice invoiceEntity = metadata.create(Invoice.class);

            invoiceEntity.setInvoiceNumber(xeroInvoice.getInvoiceNumber());
            invoiceEntity.setInvoiceDate(xeroInvoice.getDate().getTime());
            invoiceEntity.setAmountDue(xeroInvoice.getAmountDue());
            invoiceEntity.setAmountPaid(xeroInvoice.getAmountPaid());
            invoiceEntity.setTotal(xeroInvoice.getTotal());
            invoiceEntity.setSubTotal(xeroInvoice.getSubTotal());
            invoiceEntity.setTotalTax(xeroInvoice.getTotalTax());

            dataManager.commit(invoiceEntity);
        }
    }
}
As we see here, we use the XeroClient instance to call getInvoices. This method will return us all invoices from the API as a list of Invoice instances.
The package com.xero.model is auto-generated and contains all the business entities as Java classes. Those classes are generated on the XML schema definitions defined in the XeroAPI-Schemas project.
In this example, there is an Invoice class as a persistent entity in the CUBA application. After receiving every Invoice from Xero, it will be converted into a CUBA Invoice and then stored in the database.
Summary
As you see, with the SDK in place, the interaction for the application developer becomes trivial. No need to deal with OAuth tokens, private keys, HTTP response codes, data binding and so on.
Although there are downsides in using an SDK, it is oftentimes the most straightforward way of doing an integration.
Luckily with open protocols like HTTP, OAuth and so on using an SDK is just a convenient way of doing it. If this approach is not suitable in a particular case, you always can go one layer below and use the protocols directly.